Okay, so quite a few of you wrote in asking for more details and photos of the camera sling I fashioned from a sock and fixed to a sliding curtain tab on a track in the ceiling. To be honest, it’s a lot simpler than it sounds, and since it enables one to take photos from really cool angles, I thought I’d share the not-so-amazing secret. Here it is, get ready to be underwhelmed:
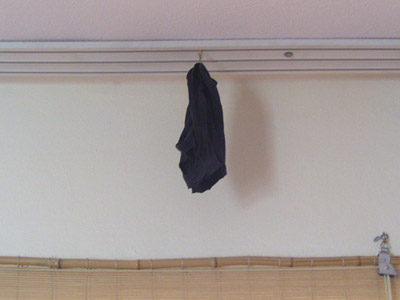
See, it’s just a sock hanging from the ceiling, like I told you. Well, there’s a little more to it than that. Look, here’s a blurry and not really helpful close-up:
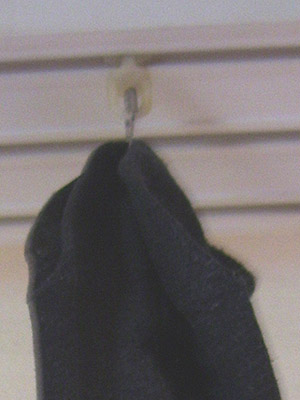
You can kind of see how I pinned the sock to the tab. If you want to make one of these yourself, a lot depends on what kind of curtain fixtures, if any, you have in your home. I’ve lived in lots of different places and I don’t think I’ve ever seen any two houses that have the same type of fixtures. Some have curtain poles or rods, some have tracks fixed to the wall (of which there are many varieties), and others have tracks like ours that are fixed to the ceiling. In any case, here’s a step-by-step instruction guide; if you’re smart and creative, which I know all my readers are, I’m sure you can adapt it to whatever your curtain situation is at home:
- Place your camera in an old sock
- Hold the sock by the top with one hand and let it hang, with the camera down in the foot part
- Arrange the camera with the other hand until you have it in the approximate position you want
- Mark places in the sock to correspond to the lens and the shutter release button, remove the camera, and cut appropriate holes in the sock (don’t make the holes too big or the camera might fall out)
- Cut one of the plastic tabs off an old curtain (here’s where you’ll have to take your own sitch into account and improvise if you don’t have tabbed curtains)
- Safety-pin the tab to the top of the sock
- Slide the tab into the track
- Play around with your camera and memorise the sequence of buttons to push so that you can focus a shot, set the timer, and hit the shutter release with your eyes closed and the camera lens facing you
- Place the camera into the sock, being careful so that the camera does not fall out
- Fiddle around with positioning as much as you can or want to
- Do your blind magic with the focus and the timer (this took some practice in my case)
- Hit the shutter release and run like hell to get into position and try to look natural
Obviously there’s some guesswork with camera direction and focus, and cutting the sock isn’t an exact science either— basically I just made some random holes, which worked out well because they’re all interchangeable and I can face the camera either straight down, straight to the side, or at an angle. There are also pros and cons to having a wall mount versus a ceiling mount. Wall-mounted cameras have restricted positioning but are more stable; cameras that hang from the ceiling can be positioned a variety of ways but have that dangly-swingy thing going on (if you have good light and set a short exposure time this annoyance can be minimised).
If you don’t have any curtain fixtures at all in your house, there’s nothing stopping you from putting a hook in the ceiling or high up on a wall and attaching your sock to that. You won’t be able to slide your camera around the room, of course, but it’s better than nothing. If you got really crazy I suppose there’s nothing stopping you from using multiple hooks on various walls, but now you’re starting to creep me out.
Anyway, I’d like to see your own SockCam photos, so I’ll show you mine if you show me yours.
You know what would be fun? If you’re having a house party we could set up a few such camera with some kind of auto click mode which would take photos from those weird angels every few minutes. At the end of the party you would have some really wacky stuff out there collected. But we need to figure out how to set it on auto timer to click many photos or have a Click button attached to the camera via a remote control or something.
Any camera techies out there have some ideas to share?
@Kapil: My camera actually has auto-click, but I think it takes frames every few seconds rather than every few minutes.
They do make remote shutter release, pros use those all the time.
@Kapil: My camera actually has auto-click, but I think it takes frames every few seconds rather than every few minutes.
They do make remote shutter release, pros use those all the time.